1. Install and start the app
2. Select and synchronize asset
3. Transits
3.1 Add transit
3.2 Edit transit
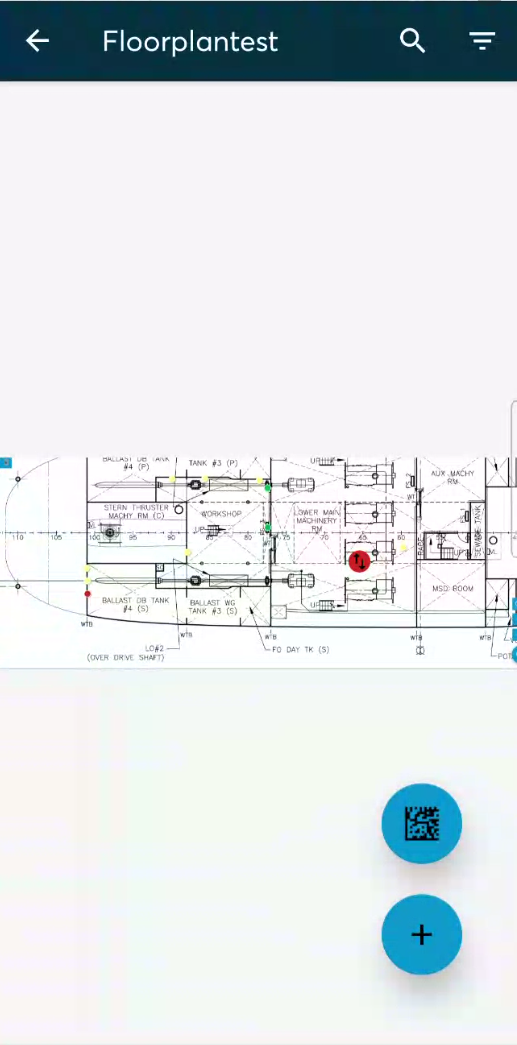
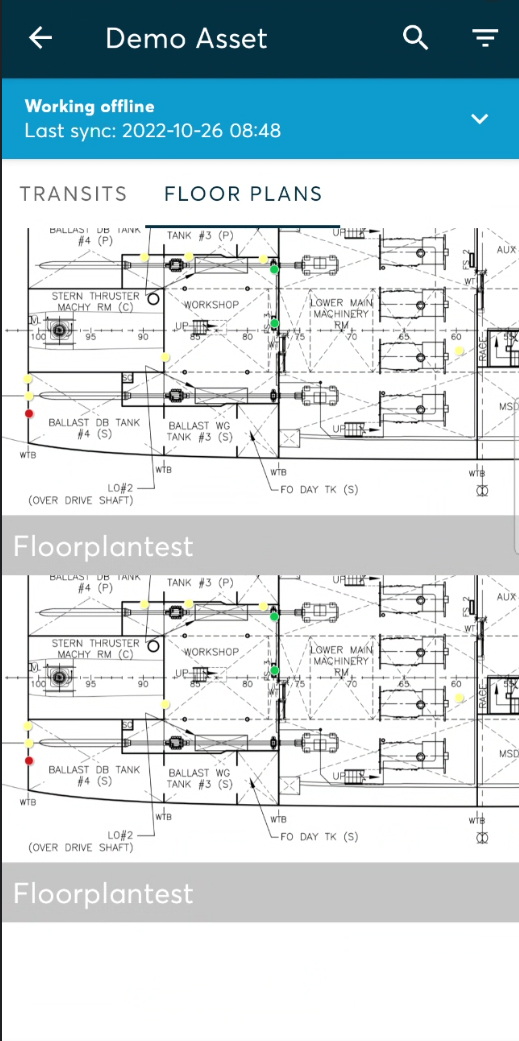
4. Floor plans
1. Install and start the app
Open the Google Play Store on your android device and install Roxtec Transit Build.
Start the application and login using your Roxtec Transit Build account.
2. Select and synchronize asset
When you have logged in to the application, you will see a list of all the assets that you have access too. If you dont see the asset that you wish to work on, please contact the asset administrator to be invited as a collaborator

After an asset has been selected, you need to synchronize it to see the latest information.

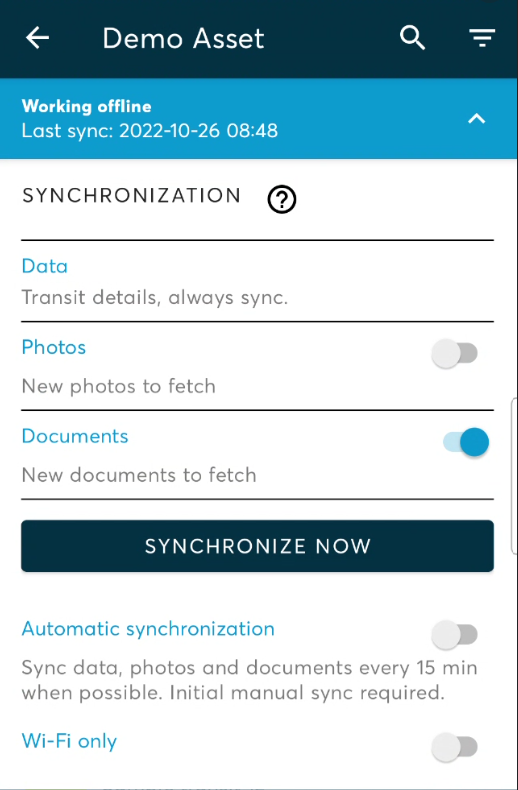
Select what items you wish to syncronize and hit “synchronize now”
Photos can be large in size and use a large amount of bandwith when syncronizing.
Please keep this in mind if your bandwith is limited.
You can also setup Automatic synchronization for the asset.
And if the sync should only take place when a Wi-Fi connection is available.
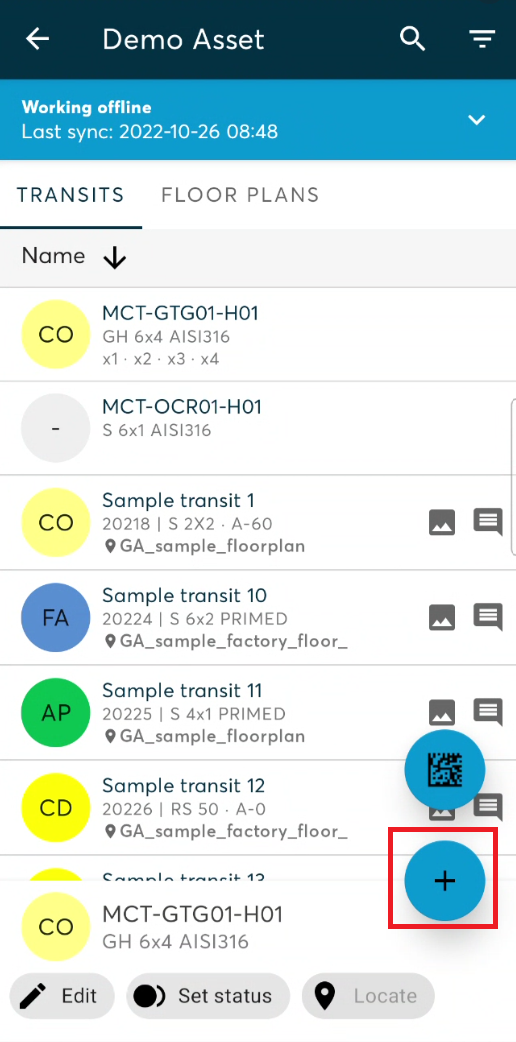
3. Transits
Under the transits tab you will see all the transits for the selected asset.
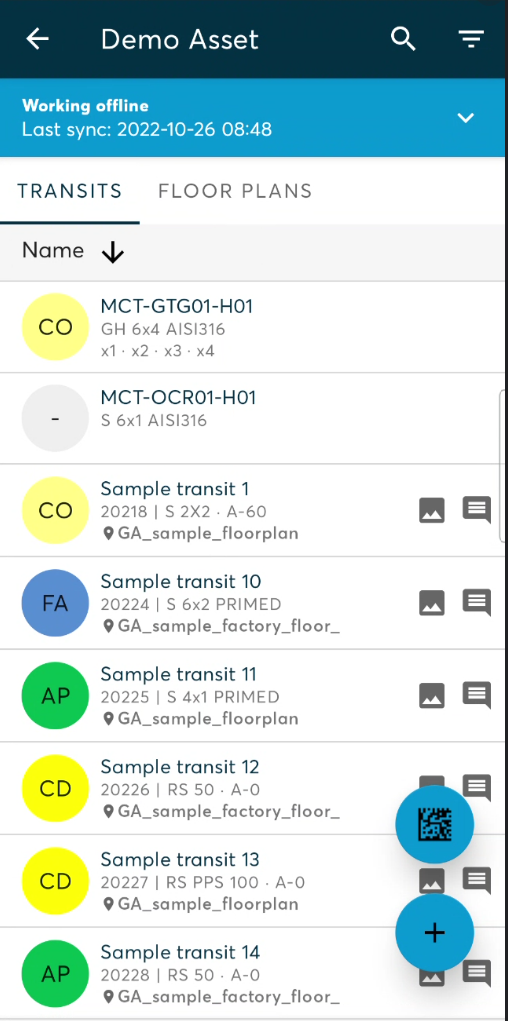
You can search for a specific transit name

You can setup a filter to find transits that meet certain criteria.

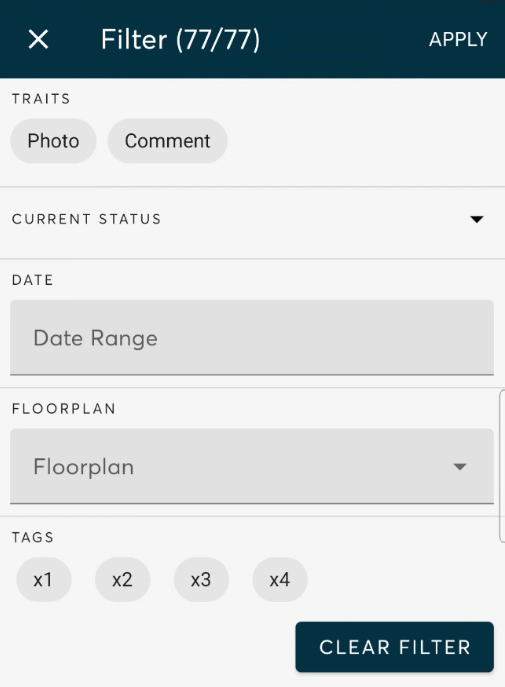
Traits
Select to show only transits that have Photos or Comments
Current status
Select to show transits with a particular status
Date
Select to show transits that have been updated during certain dates
Floorplan
Select to show transits on a particular floorplan.
Tags
Select to show transits with certain tags
3.1 Add transit
When you are in the transit list or have a floorplan selected, press the + sign to add a transit.
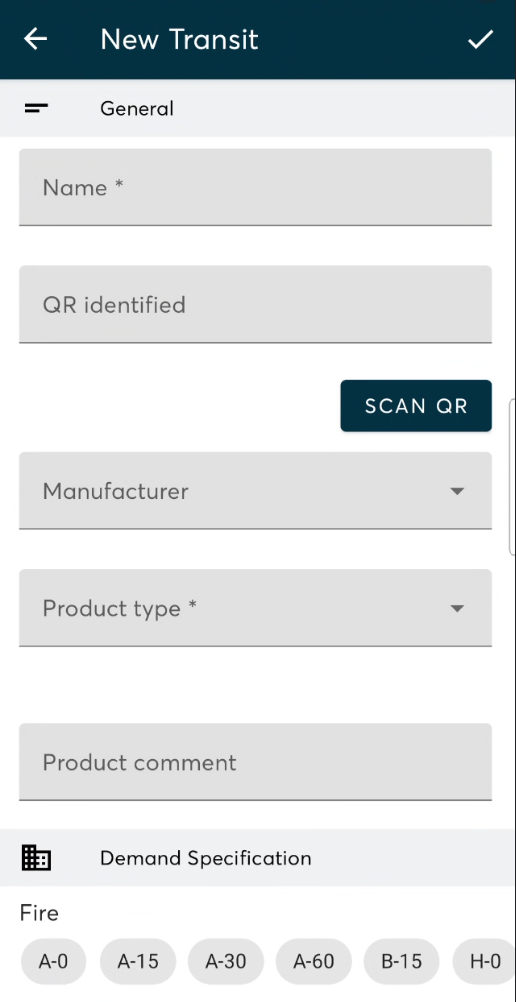
Name
Select a name for the transit
QR identified
Scan the QR code of the transit
Manufacturer
Select the manufacturer of the transit
Product type
After a manufacturer has been selected, you can select the product type of the transit
Product comment
Add an optional free text comment
Demand Specification
Fire
Specify the fire rating of the transit
Water
Specify the water rating of the transit
Gas
Specify the gas rating of the transit
EX
Specify if the transit is rated for EX
EMC
Specify the EMC of the transit
Demand specification comment
Free text comment regarding the transit ratings
Tags
Add an optional free text tag to the transit
Location
Orientation
Select if the transit is vertically or horizontally aligned
Vertical: Ceiling / Floor (deck)
Horizontal: Wall (bulkhead)
Select Drawing
Select the floor plan on which you want to place the transit.
Zoom in to the correct location on the floor plan then press and hold to place the transit.
Change or view marked location
Use this option to change the location of a transit
Zoom in to the correct location on the floor plan then press and hold to place the transit.
Location comment
Optional free text comment regarding the location of the transit
Secondary location
After the primary location has been selected, you will be able to add a reference plot in a secondary location. This can be used to show the transit on a secondary floor plan, for example on the other side of a deck, floor or ceiling.
The plotted transit will be marked with an R
Quick Actions
When all required information has been filled in, you can select to Save and set status
This will save the transit, and lets you select a status for each opening
Save transit
If you want to save the transit without setting a status, click the check mark.

3.2 Edit transit
Select a transit from the transit list or select a transit by tapping it on the floor plan
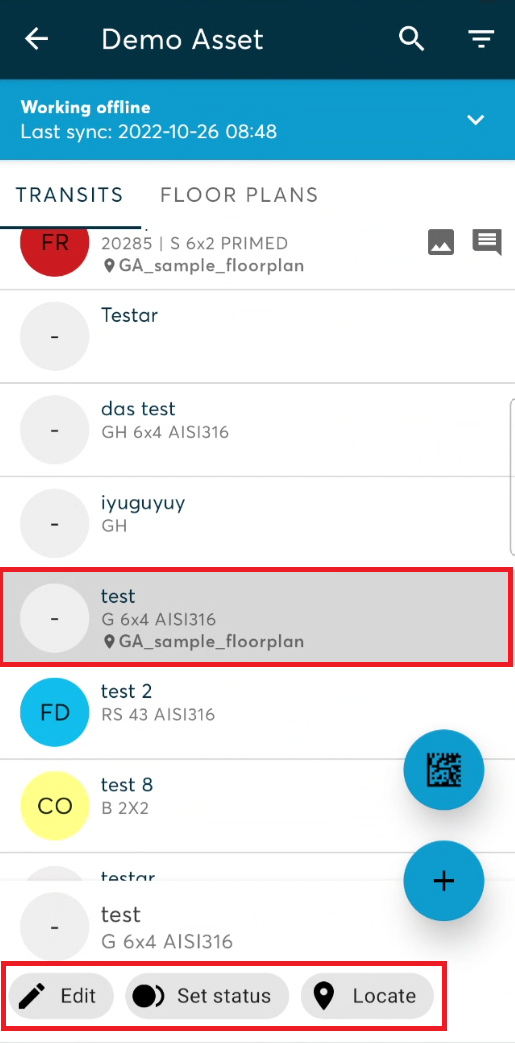
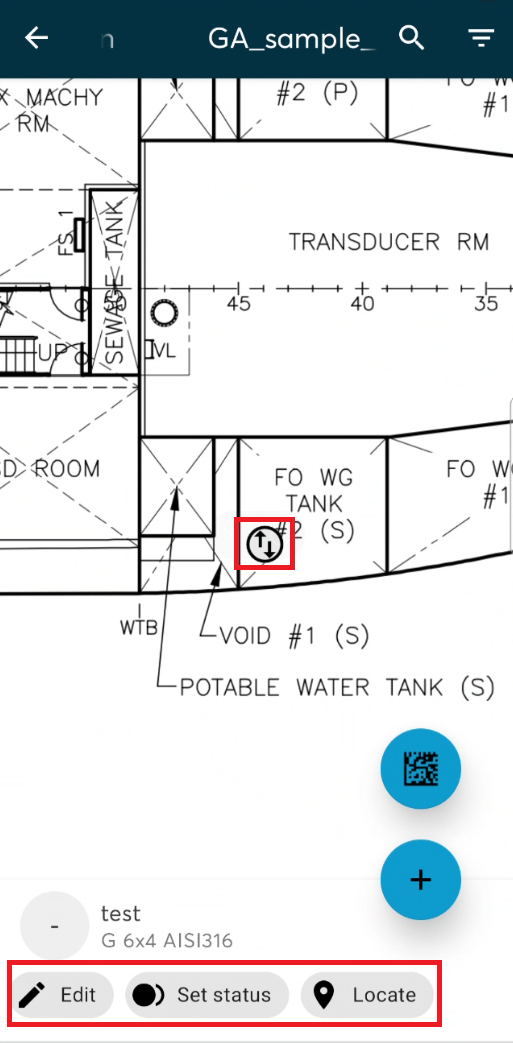
Edit
Here you will be able to change all information of the transit. Contains the same information as from Add transit
Locate
Pressing this button will locate the transit on the floor plan
3.3 Set status
Change the status of one or several openings.
Select the openings you want to change status for. In the example A1 and A2 is selected.
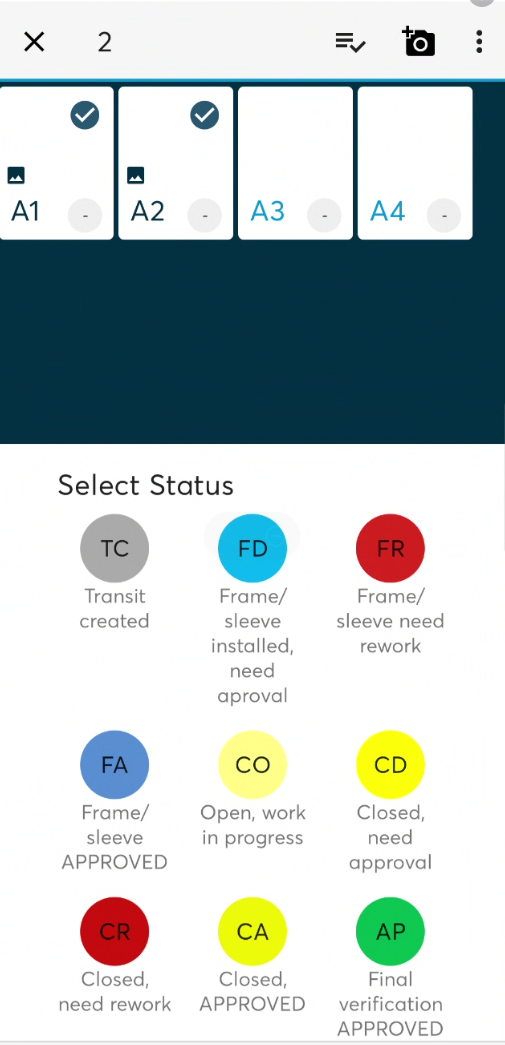
You can select to view a checklist to easily track that all required installation steps have been taken.
Swiping right will set the checklist item to green (done)
Swiping left will set the checklist item to red (not ok)

You can take a picture, it will be added in the event log for the selected openings

You can click the three dots to open an extended menu with further options.


Add Comment
Adds a comment in the event log for the selected openings. The comment will not save until a status has been selected and the changes saved.
- If using a tablet or landscape orientation, this option will appear as an icon next to the camera

Add photo from gallery
Add a photo from your gallery to the selected openings
- If using a tablet or landscape orientation, this option will appear as an icon next to the camera
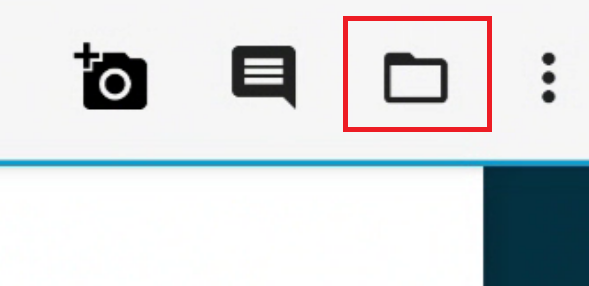
Edit Tags
Lets you add tags to the selected openings. You can freely use already created tags or create new ones.
Take Photo and Edit
Take a photo and do simple edits to it before it is saved.
You simply draw with your finger.
Using the brush icon will let you change brush size and color.
The eraser button changes it to eraser mode, which lets you remove any edits you have made.
The left pointing arrow is an undo button which undos the last change.
The right pointing arrow is a redo button with redos the last change.
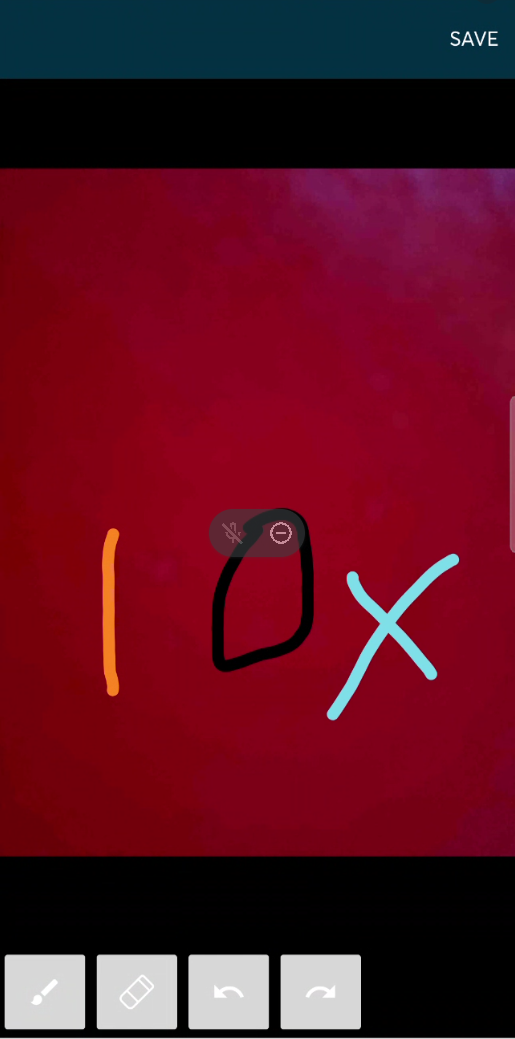
Save update
When you are finished with the changes, click the check mark to save your work.